
How to Refill an Inkjet Printer Cartridge
You’ve set up your new printer at home, and you’re super excited about it. A few months roll by, and you’re faced with the daunting task of replacing the ink in the cartridge. Not only is the ink expensive but the process itself is quite tricky. We suggest you call in an expert, but for all those DIY enthusiasts out there this article will tell you how to go about filling the ink in the cartridge.
Step 1: Buy the ink refill kit at either a local office supply store or a discount store. You can always order an ink refill kit either from an online retailer or from the company’s official website. But we suggest that you pick a more inexpensive choice from a local store. There aren’t many discrepancies in the quality of the refill ink, so a cheaper one makes sense.
Step 2: Gather certain essential materials before you start the process. Things to gather, include your kit, a clean cloth or paper towels and a roll of scotch tape. Lay out the essentials on a flat surface such as a table next to the printer.
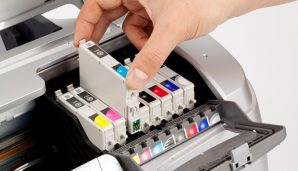
Step 3: Close the printer lid before you start out. Once the lid is closed, remove the empty cartridge from the printer. Make sure you do it carefully and slowly to ensure that no damage occurs.
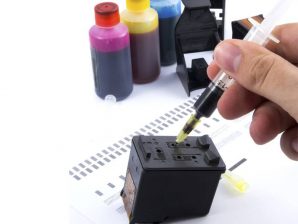
Step 4: The ink needs to be handled with care, so wear disposable gloves while handling the ink. The ink should be kept away from kids and make sure that ink under no circumstance falls in your mouth or eye. In either situation wash thoroughly and consult a doctor immediately to prevent any form of permanent damage. If you’re someone who prioritises safety over anything else, then wear goggles while working with the cartridge ink as an added safety measure.
Step 5: Use a cloth or paper towel to be the surface on which you work on the refill ink. This is done so that no ink stains appear on the surface over which the paper towels are placed.
Step 6: Empty out the old ink from the cartridge by tilting the cartridge over the paper towels. Once that is completed on the back you should see one or two holes. Remember that only one of these holes leads to the ink reservoir. The hole with the sponge in it will be the one that you need to fill the ink in. Read up on instructions in the refill kit to ensure that no mistake occurs. Use a sharp pencil or needle to pierce through the hole that you’re going to be using. Some printer cartridges come with holes for different colours; identify the correct hole into which you’re placing the syringe to fill the ink. Slowly let the ink flow into the hole, once the ink starts to ooze out stop and clean out the excess ink with the paper towel. Repeat this process for the other colours as well.
Step 7: Once the colours are filled in, use scotch tape to seal the holes so that no spillage occurs.
Step 8: Place the cartridge back into the printer and pat yourself on your back for a job well done.